
How can I use workshop activity on the LMS?
How can I use workshop activity on the LMS?
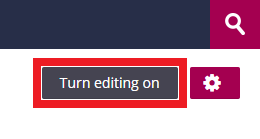
- Go to the relevant course on the LMS and click on the “Turn Editing On” button.
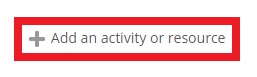
- Go to the relevant week and click on the “Add an activity or resource” option.
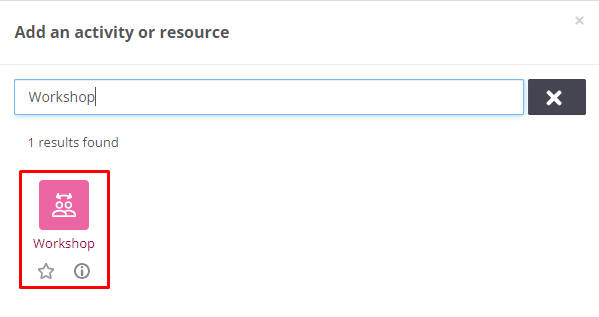
- Choose the “Workshop” option.
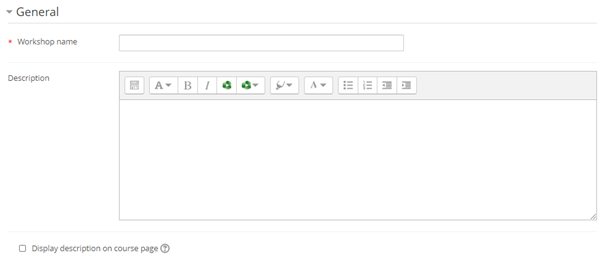
- Under the "General" field, there are“name”, “description” and “display description on course page” options.
Name: Input a name for the activity.
b. Description: Add information / instructions for the activity.
c. Display description on course page: By clicking this option, you can make the text you input in the "description" field appear on the course page.
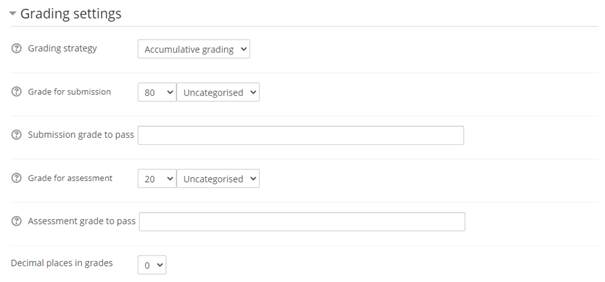
- Under the “Grading Settings” fields, there are “grading strategy”, “grade for submission”, “submission grade to pass”, “grade for assessment”, “assessment grade to pass” and “decimal places in grades” options.
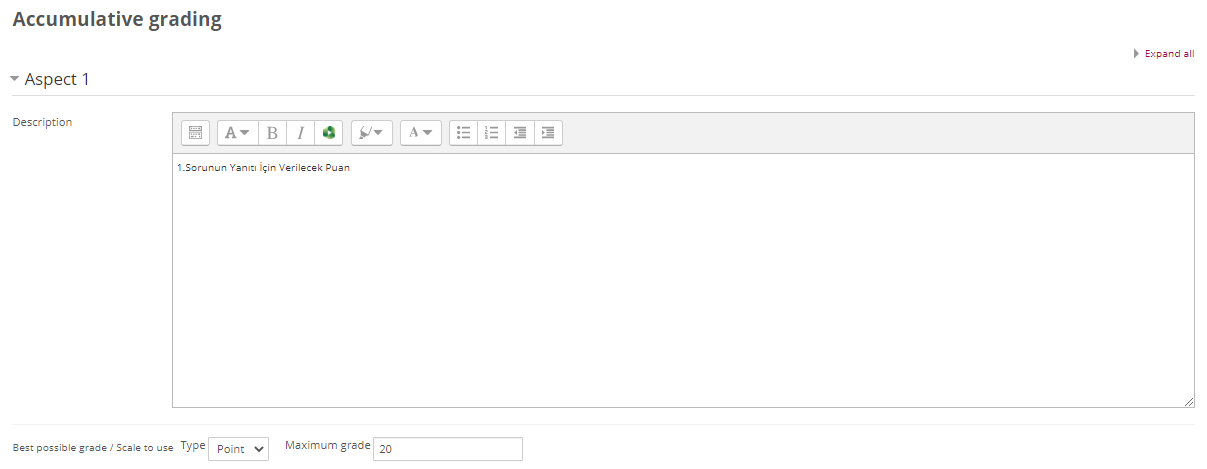
Grading strategy (Assessment strategy): Choose your assessment strategy. In this example, "Accumulative grading" is selected.
b. Grade for submission: You can specify the maximum score the student will receive from the peer review.
c. Submission grade to pass: You can indicate the passing grade for submission.
d. Grade for assessment: You can specify the maximum score the student will receive from the evaluations made for their peers.
e. Assessment grade to pass: You can indicate the passing grade for assessment.
f. Decimal places in grades: You can specify whether the grades should be in decimal places.
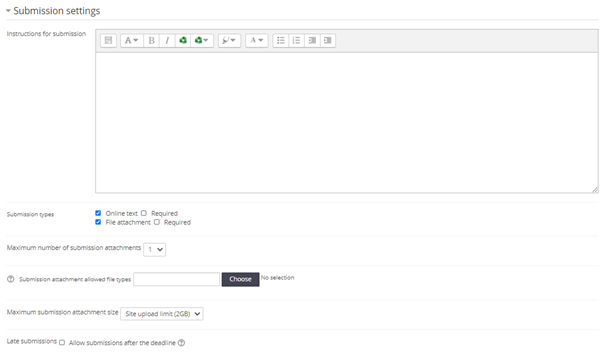
- Under the “Submission Settings” field, there are “instructions for submission”, “submission types”, “maximum number of submission attachments”, “submission attachment allowed file types”, “maximum submission attachment size” and “late submissions” options.
Instructions for submission: You can input an instruction for the submission.
b. Submission types: You can choose the type of the submitted assignment (file attachment, etc.).
c. Maximum number of submission attachments: You can specify the maximum number of files that can be attached when submitting the assignment.
d. Submission attachment allowed file types: You can choose the file format in which the assignment should be submitted.
e. Maximum submission attachment size: You can specify the maximum file size of the submitted assignment.
f. Late submissions: If you want to allow late submission, you can click on this options.
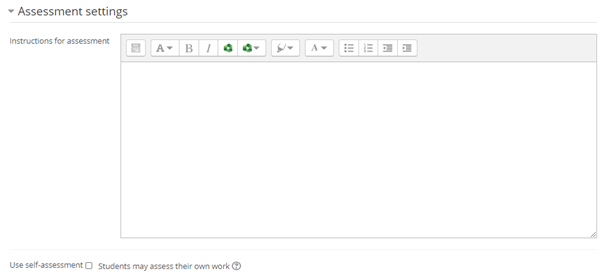
- Under the “Assessment Settings” fields, there are “instructions for assessment” and “use self-assessment”
a. Instructions for assessment: You can input an instruction on how students will evaluate the assignment.
b. Use self-assessment: If you are going to use self-assessment, you can click on this options.
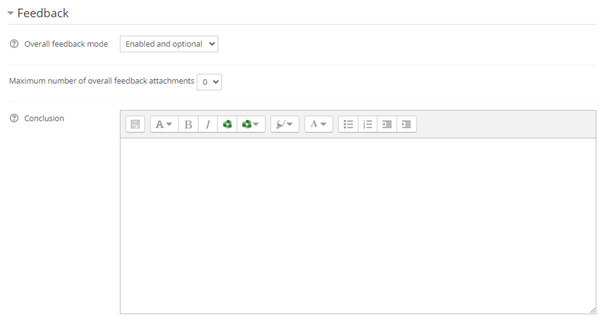
- Under the “Feedbacks” fields, there are “overall feedback mode”, “maximum number of overall feedback attachments” and “conclusion” options.
Overall feedback mode: You can enable this section if you want students to give a general comment on the assignment they evaluated.
b. Maximum number of overall feedback attachments: It is the maximum number of files that can be added when making an overall feedback (If an option other than "0" is selected in this section, options regarding file size and file format will appear).
c. Conclusion: The text added here is shown to the students at the end of the activity.
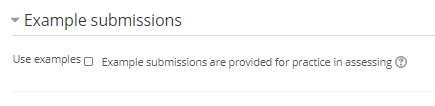
- Under the "Example Submission” field, there is an “use examples” option.
Use examples: Before the peer review, you can provide students with a sample study to practice the assessment (assessment practice performed by students is not included when calculating the actual assessment grade). When this option is activated, the rules for the assessment practice are specified.
- Complete the steps above and click on the “Save and Display” button.

- Then, you will see the following screen below.
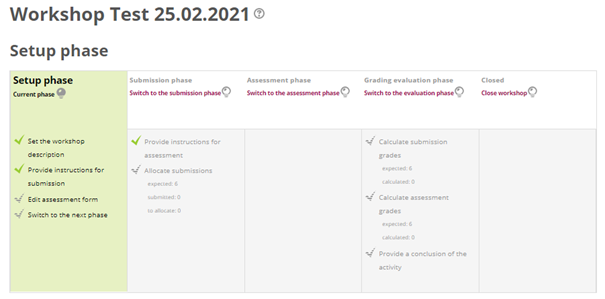
- Click on the “Edit Assessment Form” in the setup stage.
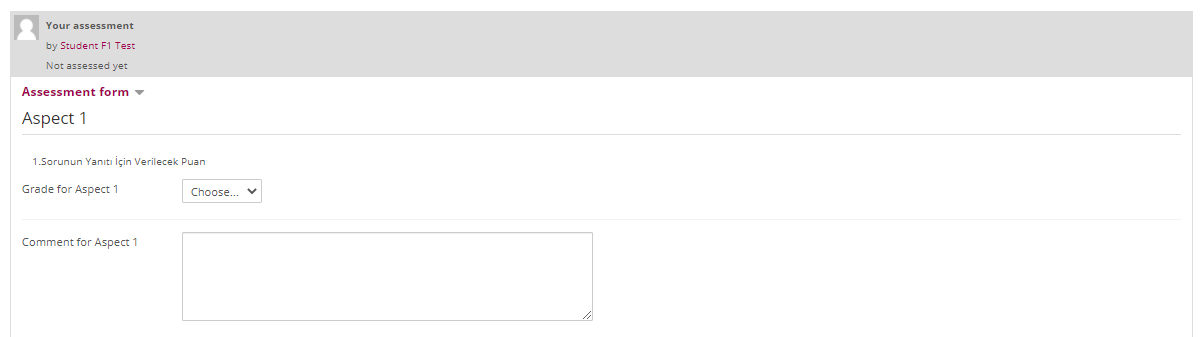
- In the Edit Assessment Form field, create the assessment form that students will use to evaluate each other's answers. The suggested format is shared below with a screenshot.
- Click on the "Switch to the next phase" in the Setup Phase to move to the Submission Phase (next phase).
- After students upload their answers to the questions as a word file, click on the "Allocate Submissions" in the Submission phase.
- In the Allocate Submissions field, select "Random" to have students randomly evaluate each other's answers. With the "Manuel" option, the same process can be done by the instructor.
a. Remove current allocations: If you have made any other allocations within the same workshop activity, you can check this option and remove these allocations. If you want to activate this option, you can click on it.
b. Participants can assess without having submitted anything: Students can participate in the evaluation process without uploading any files. If you want to activate this option, you can click on it.
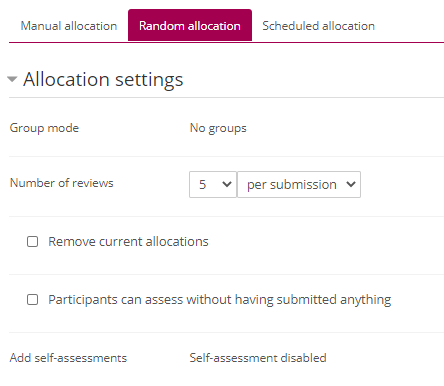
- From the Number of reviews field, how many students's work will be evaluated by each student is determined. Enter the number of people you want to be evaluated by each student and select the "per reviewer" option.
- First click on the “Save changes” button, then click on the “Continue” button.
- Then, go back to workshop activity.
- Click on the “Switch to the next phase” in the Submission Phase to move to the next phase (Assessment Phase).
-
After students have evaluated each other's works, the Assessment Phase will be completed.
-
Click on the "Switch to the next phase" in the Assessment Phase to move to the next phase (Grading Evaluation Phase).
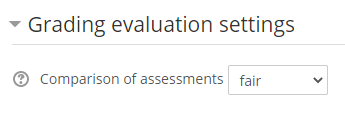
- At this phase, mark the comparison of assessment field as "fair" to calculate the assessment grade.
- Click on the "Re-calculate grades" button.
- Then, click on the "Switch to the next phase" to end the activity.
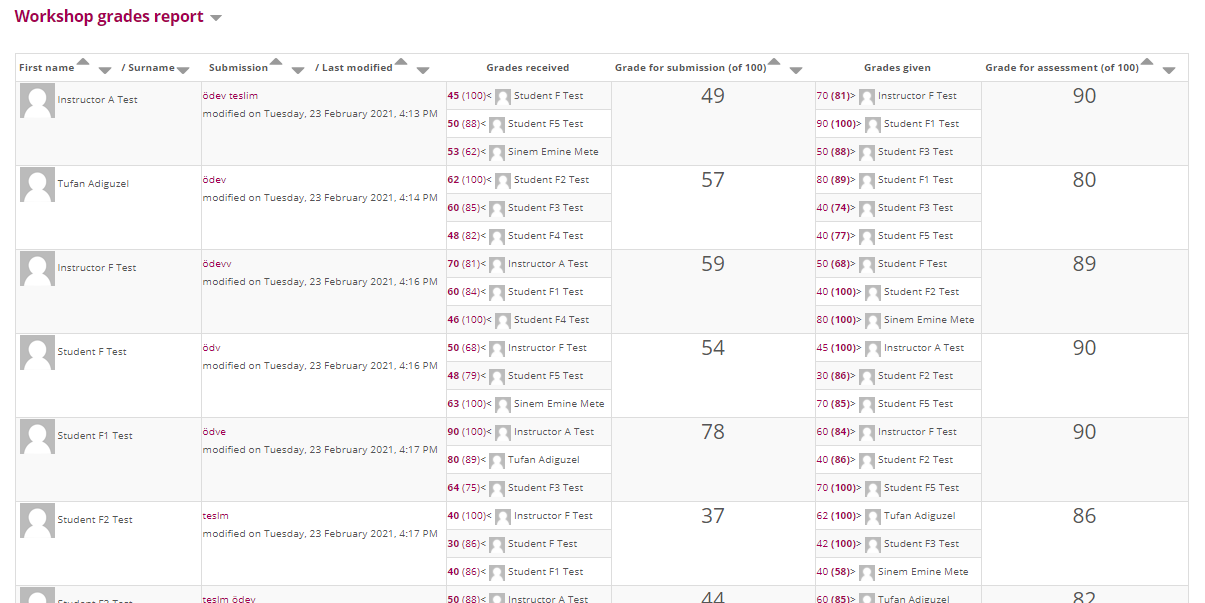
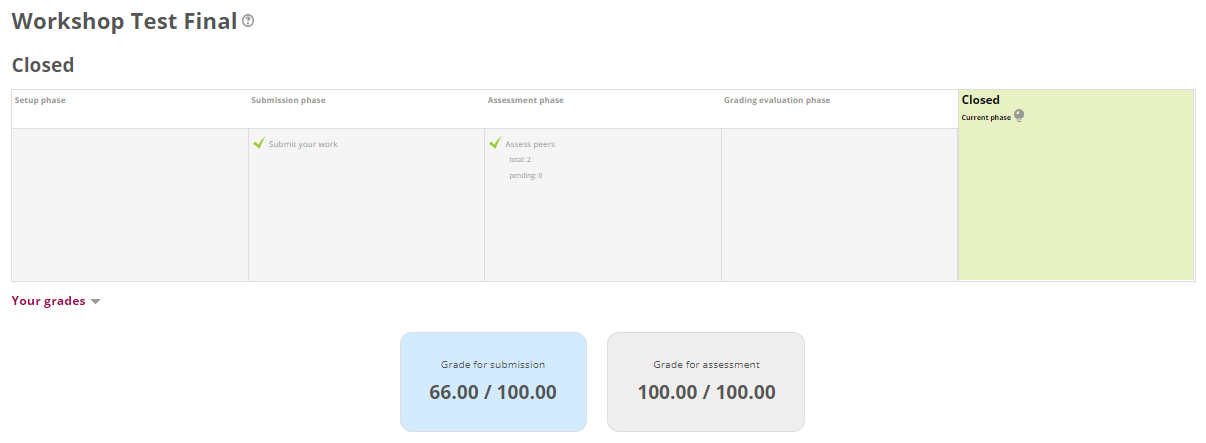
- Grade for submission: Average of the scores the student got from the peer assessment.
- Grade for assessment: Average of the scores the student gave to the peers.
-
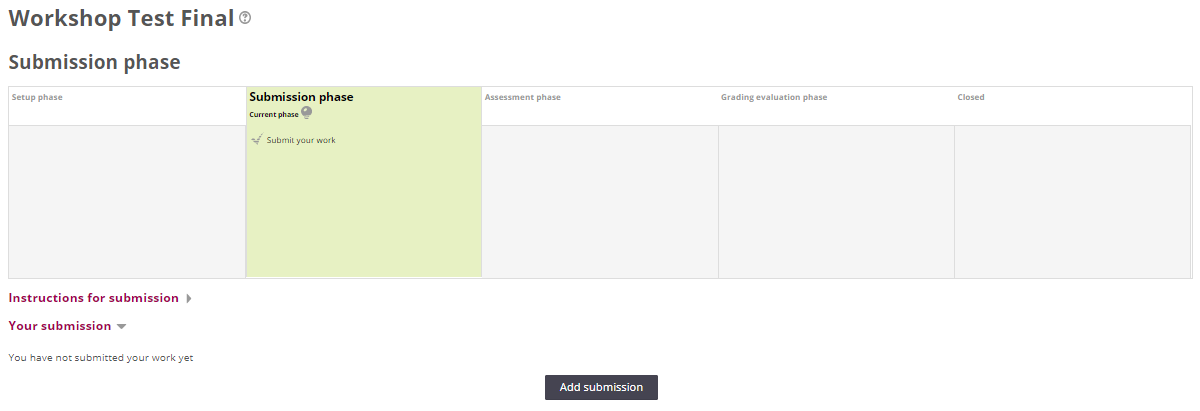
The students upload their answers to the questions as a word file by clicking the "Add submission" button.
-
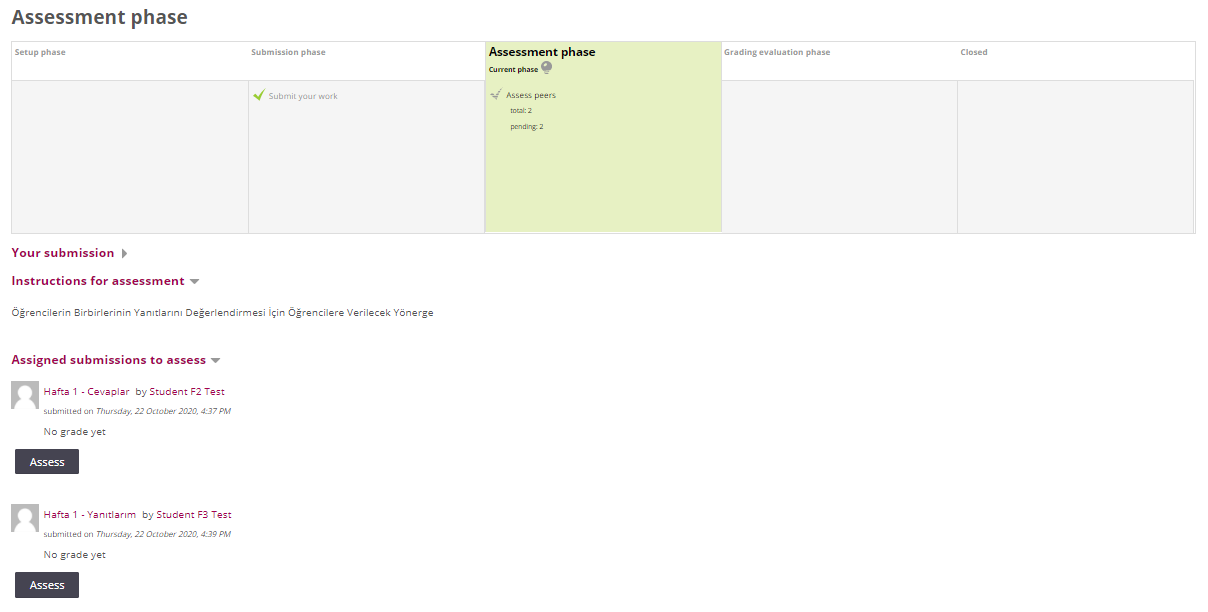
After all students upload their files to the system, a random assignment is applied by the instructor. Each student can view the students assigned to him/her to make an evaluation when he/she enters the workshop activity. The student clicks on the "Assess" button to evaluate the answers of assigned students.
- The screenshot of the interface where students evaluate each other's answers is shared below.
- After the activity is ended by the instructor, the students will see their scores received when they enter the Workshop activity.
- Log in to post comments