
With this exam method, you will be able to proctor live on Zoom and lock your students' computer screens with the Respondus Lockdown Browser at the same time. Respondus Lockdown Browser supports Windows and Mac operating systems.
In order to provide a safer and healthier exam process and see whether the settings you have chosen give the desired result, it is important that you do a “Practice Test” before the exam.
Remember to download and install the Zoom application before the exam by accessing https://zoom.us/download. Register to Zoom application with your Özyeğin account.
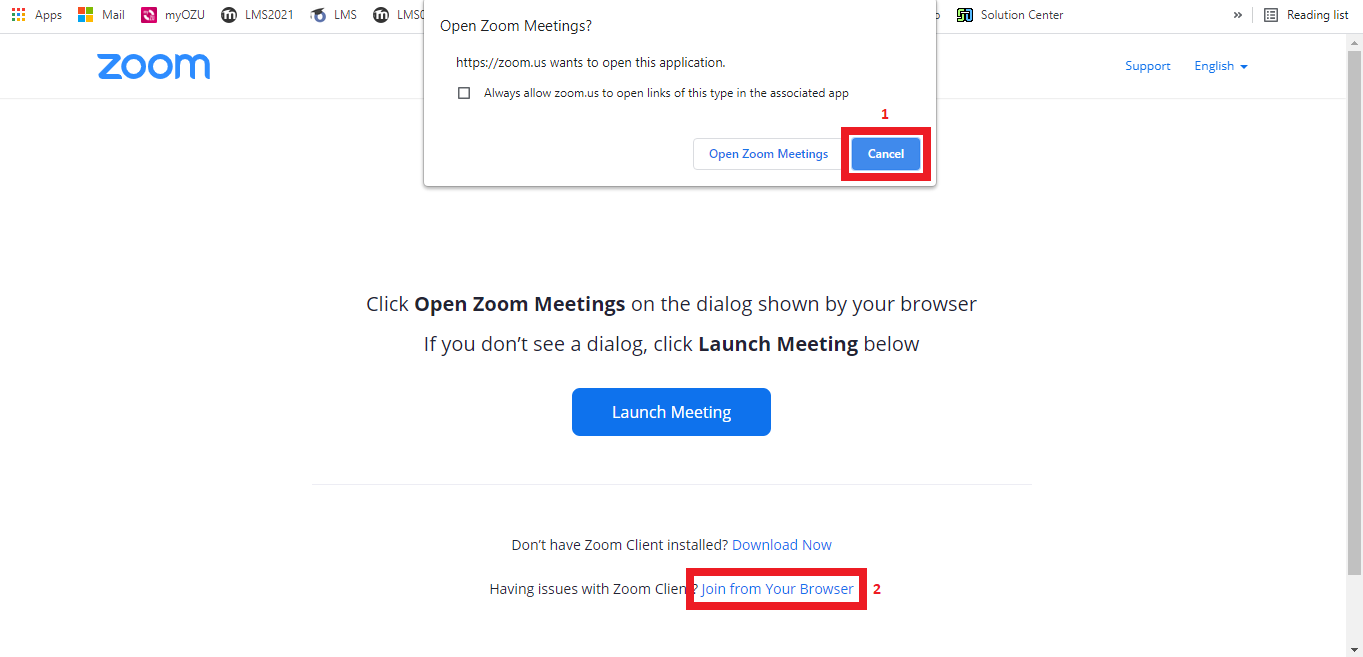
Make an announcement before the exam and ask students to log in to the Zoom Meeting you created for the exam (otherwise, Respondus ends the Zoom Meeting). The screenshot of how students can log in to Zoom via the browser is attached below.
- Create a “Zoom Meeting” on the LMS. You can see how to create a Zoom Meeting in the guide named How can I use Zoom for synchronous lessons?
- Create a “Quiz” on the LMS. You can see how to create a Quiz in the guide named “How Do I Use the LMS Quiz?”
- Click on the "Respondus Lockdown Browser" option from the "Add a Block" field on the course page in LMS.
- Click on “Dashboard” option from Respondus block.
- Click on the “Continue to Lockdown Browser” option.
- Click on the box next to the Quiz that you want to link to the Respondus software, and then click on the "Settings" option.
- Click on the “Require Respondus Lockdown Browser for this exam” option.
- You can enter an exit password for those who want to close the browser and exit the exam in the “Password to close browser and exit exam early (optional)” field under the Advanced Settings title. It is optional. Students may get an error due to internet connection problems during the exam and they need to log out. In this case, you can share this password with the students. It is recommended that you only share it with the relevant student, instead of sharing it on Zoom as all students will hear it.
- Click on the “Allow instructor live proctoring for this exam (via Zoom, Teams, etc)” option under the Proctoring title.
- Select the Select your video conferencing system field under Instructor Live Proctoring title as "Zoom".
- If you want students to use a code to enter the exam, enter a passcode in the Start code field. It is optional.
- If you want to give additional instructions to the students, you can select the "Include additional instructions to students" option and click the "Explain" link next to it and change the instruction.
- There are a number of items on how to do Zoom proctoring under the How to Conduct Live Proctoring title. It is recommended that you read.
- Click on the “Save + Close” button.
- Start Zoom Meeting.
- Inform students verbally about the start and end time of the exam and the basic rules.
- Disable the Chat feature.
- Click on the "Chat" option in the Zoom toolbar.

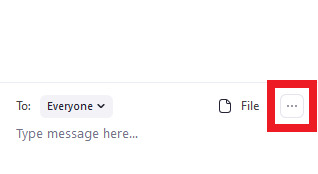
- Click on the "..." sign in the Chat panel.
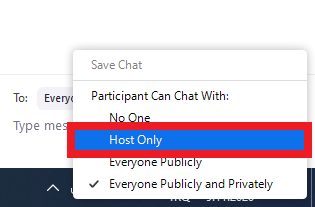
- In the screen that opens, select the "Host only" option to prevent the students from talking to each other during the exam..
- Click on the "Chat" option in the Zoom toolbar.
- Make sure students' microphones and cameras are working properly.
- Require all students to turn on their cameras and keep them open throughout the exam. Inform students that they cannot leave the Zoom Meeting or turn off their cameras until they submit the exam.
- Say all students to keep their voices open and be quiet during the exam.
- Say in turn the names of the students. Ask the named student to turn on his microphone firstly and say "here" (so her/his view will be full screen). Then ask them to hold their ID card in the camera.
- If you want to see the environment where the student will take the exam, you can ask her/his to show the room and her/his desk at this step.
- After checking the list, ask if everybody's name has been read.
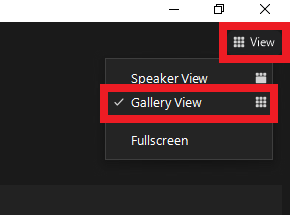
- Select "Gallery View" to view all students at the same time.
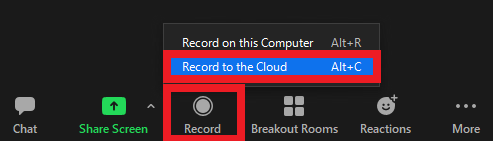
- If the exam is to be recorded, inform students about it. For recording, you can start recording with the "Cloud Recording" option or save it to your local computer with "Record on this Computer".
- Give students the starting code for the exam (if you created one).
- Start officially the exam.
- Wish the students good luck and mute your microphone.
- Remind the time 15 minutes before the exam ends.
- Give students 10 minutes to submit their exams (optional).
-
Inform that students who submit the exam can log out by clicking the "X" in the upper right corner of the Respondus browser and then typing the exit password you will give.
-
End the Zoom recording and then the Zoom meeting.
-
When the exam is completed, the exam records are saved to your local computer according to your preference, or after a short while they are automatically transferred to your "Meeting Recording" folder in Panopto.
-
In case of any suspicion of cheating, you can examine the recordings.